- Inspect the fluid level in the brake master cylinder reservoir
WARNING: Refer to Brake Dust Warning, Refer to Brake Fluid Irritant Warning.
NOTE: Always replace disc brake pads in axle sets. - If the brake fluid level is midway between the maximum-full point and the minimum allowable level, no brake fluid needs to be removed from the reservoir before proceeding.
- If the brake fluid level is higher than midway between the maximum-full point and the minimum allowable level, remove the brake fluid to the midway point before proceeding.
- Raise and support the vehicle. Refer to Lifting and Jacking the Vehicle.
- Remove the tire and wheel assembly. Refer to Tire and Wheel Removal and Installation.
- Remove the brake caliper lower guide pin bolt (2)
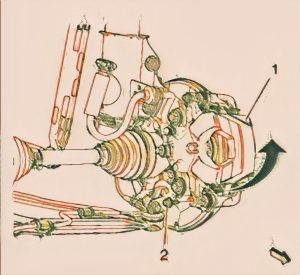
- Without disconnecting the hydraulic brake flexible hose, pivot the caliper (1) upward and secure the caliper with heavy mechanics wire or equivalent.
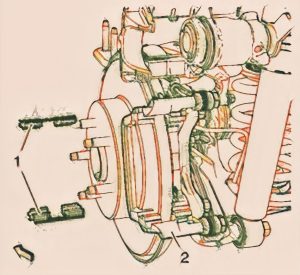
- Remove the brake pads (1) from the caliper mounting bracket.
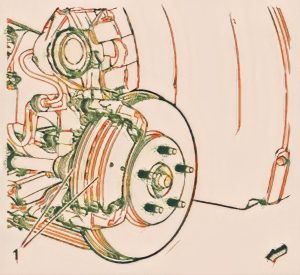
- Push the disc brake caliper piston (1) into the caliper bore using a disc brake piston installation tool.
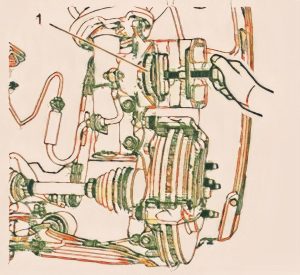
- Remove the brake pad retainer springs (1) from the caliper bracket.
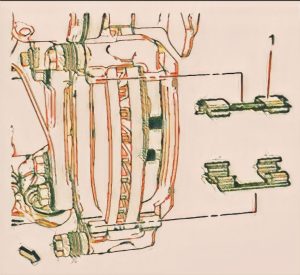
- Thoroughly clean the brake pad hardware mating surfaces of the caliper bracket of any debris and corrosion.
- Inspect the brake caliper guide pins for freedom of movement and inspect the condition of the guide pin boots. Move the guide pins inboard and outboard within the bracket bores, without disengaging the slides from the boots and observe for the following.
- Restricted caliper guide pin movement
- Looseness in the brake caliper mounting bracket
- Seized or binding caliper guide pins
- Split or torn boots
- If any of the conditions listed are found, the brake caliper guide pins and/or boots require replacement.

- Ensure the brake pad hardware mating surfaces are clean.
- Install the brake pad retainer springs (1) to the brake caliper bracket. Apply a thin coat of high-temperature silicone lube to the brake pad retainers.
- Install the brake pads (1) to the caliper bracket
- Remove the support and rotate the brake caliper into position over the disc brake pads and to the caliper mounting bracket.
- Install the lower brake caliper guide pin bolt and tighten to 28 N.m (21 lb ft)
CAUTION: Refer to Fastener Caution - Install the tire and wheel assembly. Refer to Tire and Wheel Removal and Installation
- Lower the vehicle.
- With the engine OFF, gradually apply the brake pedal approximately 2/3 of its travel distance.
- Slowly release the brake pedal.
- Wait 15 seconds, then gradually apply the brake pedal approximately 2/3 of its travel distance again until a firm brake pedal apply is obtained. This will properly seat the brake caliper pistons and brake pads.
- Fill the master cylinder auxiliary reservoir to the proper level. Refer to Master Cylinder Reservoir Filling .
- Burnish the brake pads and the brake rotor. Refer to Brake Pad and Rotor Burnishing
- Inspect the fluid level in the brake master cylinder reservoir
WARNING: Refer to Brake Dust Warning, Refer to Brake Fluid Irritant Warning
NOTE: Always replace disc brake pads in axle sets. - If the brake fluid level is midway between the maximum-full point and the minimum allowable level, no brake fluid needs to be removed from the reservoir before proceeding.
- If the brake fluid level is higher than midway between the maximum-full point and the minimum allowable level, remove brake fluid to the midway point before proceeding.
- Raise and support the vehicle. Refer to Lifting and Jacking the Vehicle
- Remove the tire and wheel assembly. Refer to Tire and Wheel Removal and Installation .
- Remove the brake caliper mass dampener (2)
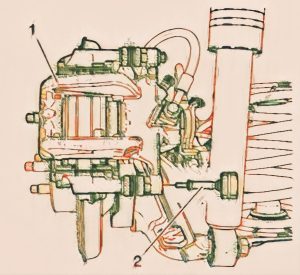
- Without disconnecting the hydraulic brake flexible hose, pivot the caliper (1) upward and secure the caliper with heavy mechanics wire or equivalent
CAUTION: Support the brake caliper with heavy mechanic wire or equivalent, whenever it is separated from its mount and the hydraulic flexible brake hose is still connected. Failure to support the caliper in this manner will cause the flexible brake hose to bear the weight of the caliper, which may cause damage to the brake hose and in turn may cause a brake fluid leak. - Remove the brake pads (1) from the caliper mounting bracket (2).
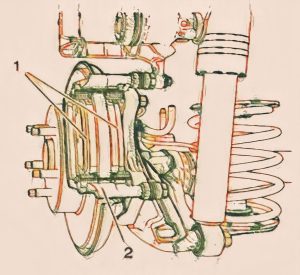
- Remove the brake pad retainer springs (1) from the caliper bracket (2)
- Thoroughly clean the brake pad hardware mating surfaces of the caliper bracket, of any debris and corrosion.
- Inspect the brake caliper guide pins for freedom of movement and inspect the condition of the guide pin boots. Move the guide pins inboard and outboard within the bracket bores, without disengaging the slides from the boots and observe for the following:
- Restricted caliper guide pin movement
- Looseness in the brake caliper mounting bracket
- Seized or binding caliper guide pins
- Split or torn boots.
- If any of the conditions listed are found, the brake caliper guide pins and/or boots require replacement.
- Ensure the brake pad hardware mating surfaces are clean
- Install the brake pad retainers springs (1) to the brake caliper bracket (2) and apply a thin coat of high temperature silicone lube to the brake pad retainers.
- Install the brake pads (1) to the caliper bracket (2)
NOTE: The wear sensor equipped disc brake pad must be mounted inboard of the rotor with the leading edge of the sensor facing the brake rotor during forward wheel rotation or at the top of the pad when installed in vehicle position.
- Rotate the brake caliper piston (1) into the brake caliper bore
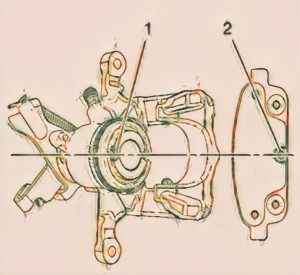
- Align the notch on the brake caliper piston with the pin (2) on the disc brake pad.
- Remove the support and rotate the brake caliper (1) into position over the disc brake pads and to the caliper mounting bracket.
- Install the lower brake caliper mass dampener (2) and tighten to 28 N.m (21 lb ft).
- Install the tire and wheel assembly. Refer to Tire and Wheel Removal and Installation
- Lower the vehicle.
- With the engine OFF, gradually apply the brake pedal approximately 2/3 of its travel distance
- Slowly release the brake pedal.
- Wait 15 seconds, then gradually apply the brake pedal approximately 2/3 of its travel distance again until a firm brake pedal application is obtained. This will properly seat the brake caliper pistons and brake pads.
- Fill the master cylinder reservoir to the proper level. Refer to Master Cylinder Reservoir Filling
- Burnish the brake pads and the brake rotor. Refer to Brake Pad and Rotor Burnishing
We hope that this concise yet comprehensive instruction on the removal, repair processes of the brake system pads for your Cruze has been very helpful, as we have now finished the steps to follow for each of the discs that comprise the brake pad system of the 2014 Chevrolet Cruze 2.0.
Even though it might seem simple to handle these tasks manually from your garage. We have mechanical engineers on staff who specialize in brakes and can respond to your car’s needs right away.Give our team at Auto Tech Mobile a call to experience our brake repair, replacement, installation, and tune-up services in the convenience of your own home.